First create a blogger.com account and a new blog
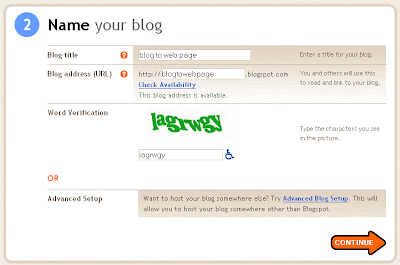
The first thing you need to do is to create a blog with blogger.com. First you will need to create an account. The second step is to name your blog. Before you finish this, click the 'Advanced Blog Setup' option, since you will be hosting your blog content somewhere else (in your own web space)
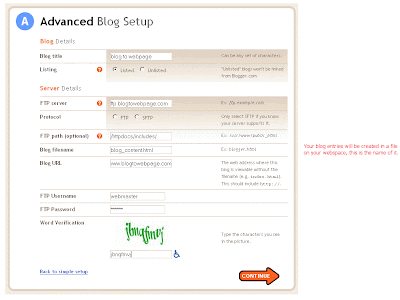
In the advanced setup you can add your websites FTP details, FTP path you want to use and the name of the file you want blogger to create and send there for you (in this case I've asked for it to be called 'blog_content.html'.
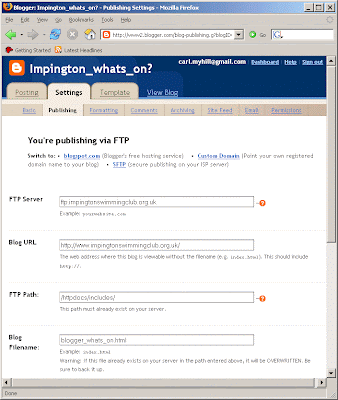
I am a big fan of looking at lots of examples. I fabricated the one above but the following settings are the ones we use on our swimming club website www.impingtonswimmingclub.org.uk, the first page of which is powered by blogger content.
After you have finished with this page you will be asked to choose a template. You will not be using it really so just pick anything (such as 'son of moto' in green) and then you are done.
Invite the people you want to be able to edit the blogger served webpage
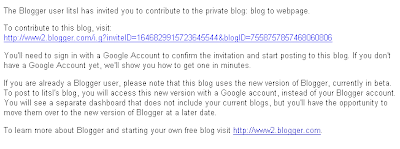
The next thing you may want to do is decide who you will allow to edit the blog. Go into the Blog 'Settings' tab and choose 'Permissions' and then 'Add Authors' to enter the email addresses of people who you would like to edit the blog.
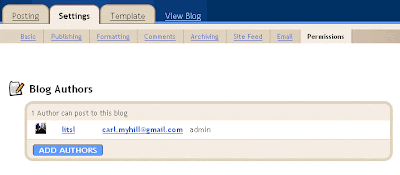
The people you invite will get an email like the one below. They will need to sign up for a google account in order to post to the blog but google accounts are GREAT! Not a hassle.
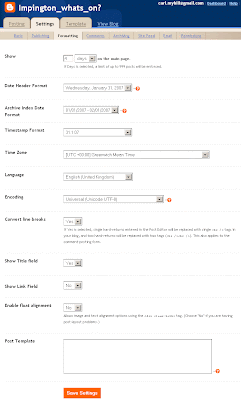
Explore formatting options - how many posts do you want to show on the webpage?
You may now like to explore other 'formatting' options from the settings page. Depending on how active your page becomes you may need to tune this a bit to decide how many entries you want to post to your webpage. Here are the settings we currently use on the Impington Swimming Club website.
Inserting your blogger file into your webpage using a PHP Include
Now you need to edit your webpage HTML to read in this new file blogger is going to send (via FTP) to your webspace. Again, here is an example from the Impington Swimming Club website. This is pretty simple stuff though it uses 1 line of PHP.

You will notice that the 'Main' content of the webpage is kept within a <div> block (that's not really important here). You'll see a heading <h2> and then 1 line of PHP. Look carefully at the syntax of that line, it's easy to make a mistake if you are unfamiliar with PHP. The most important thing to notice here is that the PHP Include Path may look different than you are used to when refering to different web pages on your webspace (I think they call this 'fully resolved' but I'm afraid I don't remember all of the nuances of this but I think my webspace provider 34sp helped me out with it).
When this works, what happens is that the line of the PHP include will be replaced with the actual contents of the file from blogger, which in the impington example is called, "blogger_whats_on.html". Here's a snippet of our what that current file looks like. It's just a snippet of clean HTML produced by blogger. Heading tags and everything else will adopt the style you already have set up for your website, perhaps in your CSS file.

So, that's that.
Editing the webpage via the blogger interface
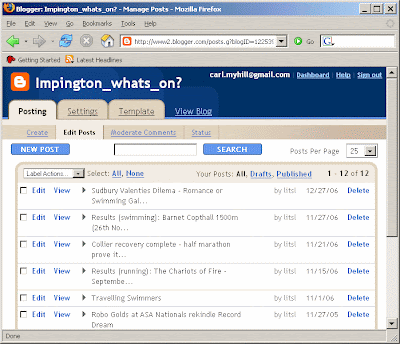
When your prospective webpage editors want to change the blogger served content of your webpage they simply go into blogger and blog away. To control the order of the posts editors may like to play around with the posting dates. It's not very elegant but it's pretty simple. Here's what the editing interface looks like...
If people want to add photos to their blogger posts, they can do this in the usual way (see some of the 'lessons' below).
Feedback please
OK, this 'lesson' has been written largely from memory. Please do let me know if you have any trouble making sense of it.

1 comment:
What about if you have an established blog and you want to move that to a new website?
KapSha
Post a Comment